Uli -
Interesting picture.
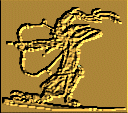
While those Mongolia bows were obviously quite effective, as far as grooving goes, those are pretty poor looking grooves. They aren't even all parallel to the limb and some ppear to run off one side.
I suppose this should be somewhat encouraging to someone like myself who hasn't done any grooving yet, because it suggests that non-matching grooves do not have to be all that perfect for the bow to succeed.
Glueing with non-matching grooves
-
Edmund Dohnert
- Posts: 53
- Joined: Wed Jun 05, 2013 8:17 pm
- Location: Wilmington, Delaware USA
-
Uli

- Posts: 600
- Joined: Sat Aug 13, 2005 7:33 pm
- Location: Saxony (home), Baltic (now)
-
jkekoni

- Posts: 332
- Joined: Mon Sep 03, 2007 6:14 am
- Location: Espoo,Finland
-
Edmund Dohnert
- Posts: 53
- Joined: Wed Jun 05, 2013 8:17 pm
- Location: Wilmington, Delaware USA
Well, I think I'm beginning to understand a little bit more about non-matching grooves. I recently made myself a homemade scraper and guide fixture to ensure that the grooves are all parallel to the centerline of the limbs.
My grooves are a bit on the shallow side, as I purposely didn't want to overdo it.
I have just completed applying two coats of thin (10-percent) hide glue to both the grooved horn plates and the grooved limbs. The wood appears to soak it up quite readily, the horn somewhat less so. I think I need several more coats of the thin glue before I start with the thicker glue (maybe 20 -30-percent?) leading up to the final application before clamping. (I've made a clamping strip similar to the one shown in Adam Karpowicz's book.)
It would appear to me that for non-matching grooves, the grooves on both the horn and wood should be almost totally filled with glue before the final gluing, so that there are no void spaces when the whole thing is done. However, it would also seem that there might be some danger in filling the grooves beyond the high points of the grooves, as that would lead to a thick glue line and potential bonding problems.
I was wondering if it might not be a good idea to give both the horn and the wood a VERY light final scraping with a flat scraper (such as a razor blade) to remove any excess glue from the high point before the final gluing with the heavy glue, so as to ensure two very flat surfaces and to avoid any lumps due to excess glue in one spot or another. Or would this be looking for trouble?
Any thoughts out there would be most appreciated.
-
Uli
- Posts: 600
- Joined: Sat Aug 13, 2005 7:33 pm
- Location: Saxony (home), Baltic (now)
IMHO the collagen glues contract so enormously during drying that any voids including the grooving should be filled. your idea is interesting, because with much coating the surface will not be flat but rounded at the edges. in a very thick glue line you will notice how the glue that initially is squeezed out or bulges from the joint will later retract toward the center.
-
Edmund Dohnert
- Posts: 53
- Joined: Wed Jun 05, 2013 8:17 pm
- Location: Wilmington, Delaware USA
Thanks Uli -
That pretty much summarizes my thinking. Non-matching grooves would appear to not accomplish much if you do not have perfectly flat horn and wood surfaces prior to doing the final gluing. But you really can't achieve that if you have layers of glue built up on top of the 'peaks' of the grooves. Thus, I would think that a very light scraping with a straight scraper before final gluing would go a long way in ensuring a nice flat glue line.
So, I think that once I get all these shallow grooves filled with dried glue, I will give both the horn and wood a very light one or two passes with the flat scraper to make the adjoining surfaces more flat. Then I'll apply a very thick coat of glue and hurriedly do the clamping.
Right now I am very patiently filling grooves with multiple coats of thinned glue (10%). It is slow going.
-
mikekeswick
- Posts: 404
- Joined: Tue May 05, 2009 11:01 am
- Location: Durham,Engalnd
Yes but just before clamping the surfaces are made really quite hot. This heat allows the horn to conform to whatever shape the core is any way. Plus you have got a thick piece of wood to act as a form. Clamp with the rope method and you will be getting a very strong clamping force that will easily make the two surfaces mate perfectly.
-
Edmund Dohnert
- Posts: 53
- Joined: Wed Jun 05, 2013 8:17 pm
- Location: Wilmington, Delaware USA
mikekeswick -
Thanks for the advice.
I made both the core and horn strips nice and toastie before gluing, and I am certain I had fully liquid glue even well after everything was clamped in place. As I don't trust myself with the rope/cinching method of clamping, I made a pressure pad (per Adam Karpowicz's book) consisting of six wood blocks attached to a strip of poster board and a strip of felt over that. I clamped the horn strips in place with six big C-clamps.
The time and effort I took to make the horn strips and core belly as flat and matching as possible (with nice parallel shallow grooves) appears to have paid of. After filing the edges of the limb to get them closer to shape, I appear to have a very straight and practically invisible glue line. Of course, the proof of whether this was successful will come much later.
I will now spend some time CAREFULLY adjusting the cross-sectional shape of the horn/core, as both are still rather thick for the draw weight I am going for (no more than 60 -65 lbs). In its present form, even without any sinew attached, the bow is VERY stiff.